
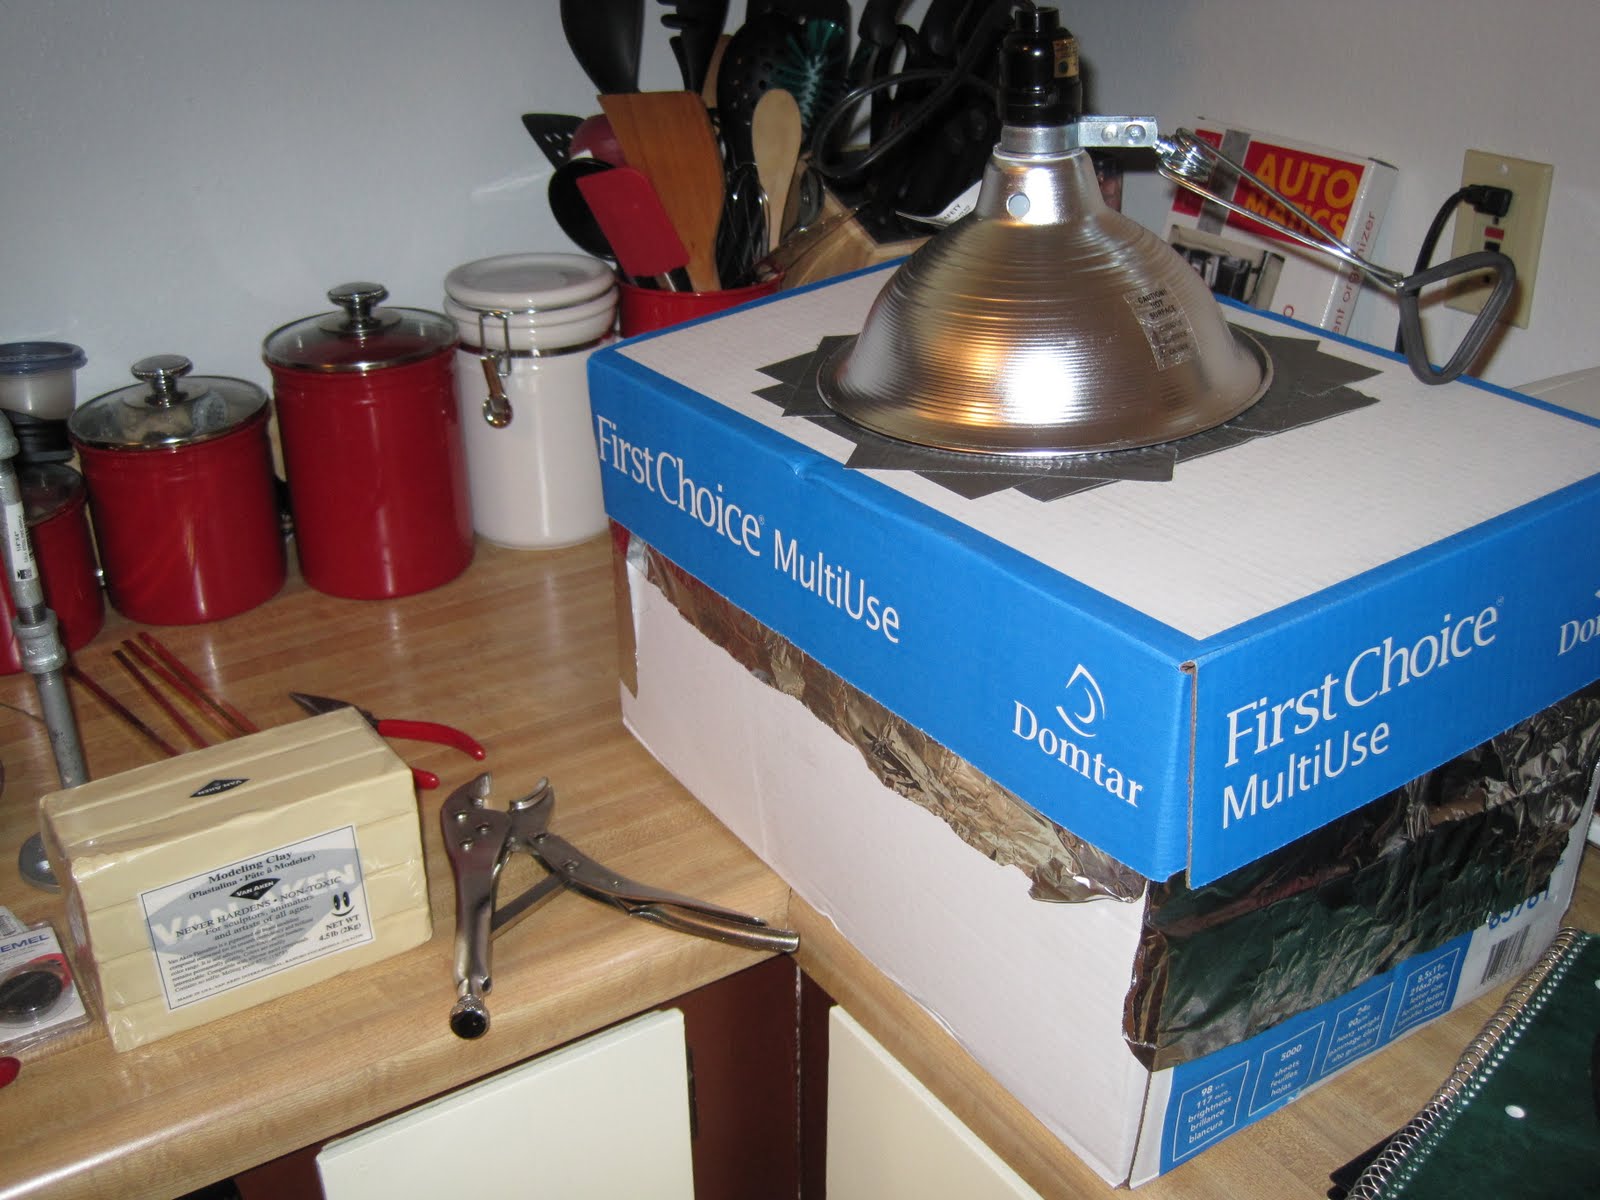
Oil-based clay needs to be warmed up in order to make it more pliable and easier to work with. This generally involves a small oven. Lucky for us, they're very easy to build. Get a file or paper box, line it and the inside of the lid with aluminum foil. Using a standard clip-on lamp that you can buy at any hardware store, measure and cut a hole that is about 1" smaller than the diameter of the metal bell on the light. Don't forget to line the hole with foil as well. A 60 watt light is perfect for this.
Cut smaller sections of the clay and place in the oven. After about 15 minutes, you should be ready to get started. Start with a basic skeletal structure to begin. Pelvis, skull, arms, legs, feet, ribcage, etc.


This would be a good time to check out a book about anatomy. That way, you can use the pictures as a reference for where structures reside.
1 comment:
Cool, now your getting to the fun stuff.
Jeff
Post a Comment